|
Last modified: 2011-12-13
Export Options OverviewWhen you are done with your image editing, it is time to export your work in a standard image file format. Exporting the image allows you to further edit the image in another tool, to publish it online or other tasks.
HDRengine can export images in the JPEG and TIFF formats.
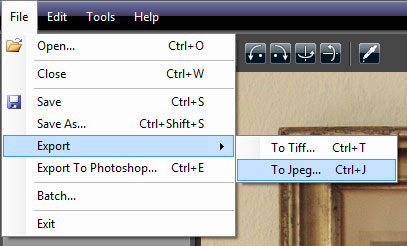
Exporting to JPEGThe JPEG should only be used when exporting an image for web publishing. Use the TIFF format if you plan to archive your image or edit it in another tool.
Exporting to JPEG:
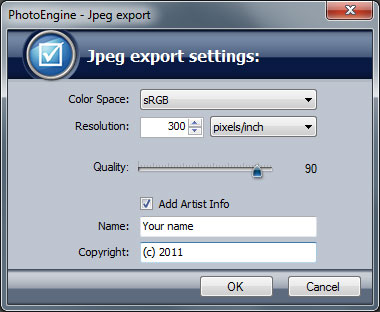
During the export process HDRengine displays the JPEG Options dialog.
Selecting the Color Space:
As JPEG is an 8-bit file format, it is recommended to only use the sRGB or Adobe RGB color space.
Selecting the Resolution:
The Resolution does not change the image pixel size (the width and height remains unchanged). The resolution sets the physical size of the printed image.
Selecting the Quality:
The Quality defines the level of compression of the JPEG file. The lower the value, the lower the file size will be. It is recommended to use a value of 80 or higher for an adequate quality.
Setting the Artist Info:
The copyright and artist name data are stored in the relevant image Exif fields.
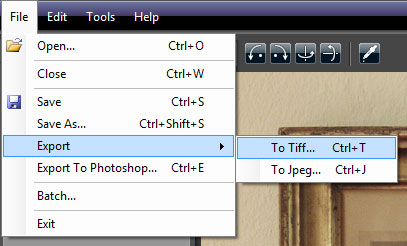
Exporting to TIFFThe TIFF format is the recommended file format for exporting images from HDRengine. TIFF images are using a lossless compression method that entirely preserves the image quality.
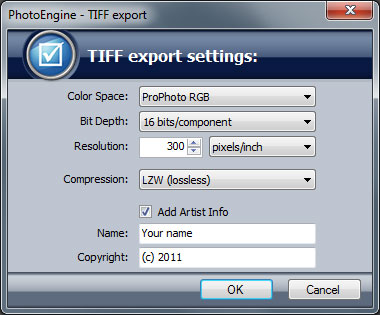
If you plan to edit the image in another tool, the recommended settings are:
Exporting to TIFF:
During the export process HDRengine displays the TIFF Options dialog.
Selecting the Color Space:
Selecting the Bit Depth :
Selecting the Resolution:
The Resolution does not change the image pixel size (the width and height remains unchanged). The resolution sets the physical size of the printed image.
Selecting the Compression:
Setting the Artist Info:
The copyright and artist name data are stored in the relevant image Exif fields.
|
|
| Copyright © 2025 Oloneo SAS |


