|
Last modified: 2011-06-02
HDR ToneMap: Advanced Image SettingsPhotographic Print ToningPhotographic Print Toning simulates a chemical process that replaces the silver contained in the photo emulsion by a toner or another metal. This process usually adds two tones to black and white photographic prints: one for the deep shadows and one for the highlights. Popular print tonings are: sepia, selenium, gold and platinum.
Unlike the real world process, the Photographic Print Toning in PhotoEngine can also work with color photos.
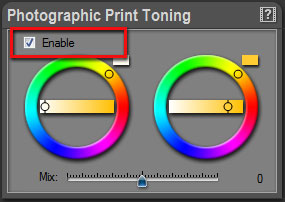
Enabling Photographic Print Toning:
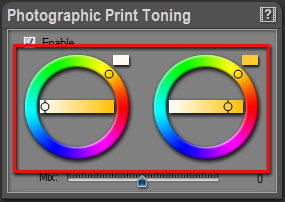
Editing shadow and highlight tones:
First set the Saturation slider to zero to simulate the regular print toning of a black and white photo. The Saturation slider is located in the Load Dynamic Panel.
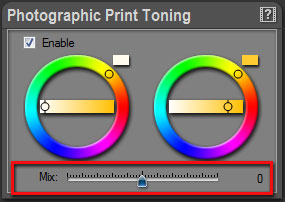
Editing shadow and highlight Mix:
The Mix value defines the balance between shadow and highlight toning. When Mix has a negative value, most of the image is toned with the shadow tone. When Mix has a positive value, most of the image is toned with the highlight tone.
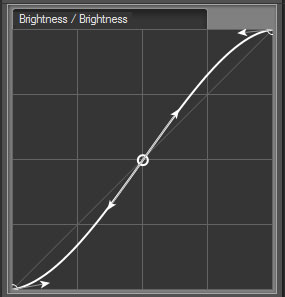
Brightness CurveThe Brightness Curve is a powerful tool. Use it to fine tune the shadow, mid and highlight tones of your image.
Editing brightness curve:
Trick: If you want to work on the shadows only, add one or two points to the middle and top portions of the curve. This will lock the upper part of the curve. Do the reverse when working on the highlights.
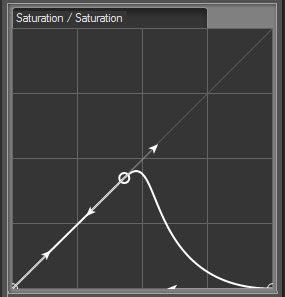
Saturation CurveThe Saturation Curve is a unique feature of PhotoEngine. Conceptually, it works like a regular brightness curve but in the saturation domain. The input is the original saturation of the image (horizontal axis). The output is the edited saturation (vertical axis). The shape of the curve determines how the input saturation is mapped to the output saturation.
The bottom left of the curve controls the pixels with a low saturation; the upper right portion controls pixels with a high saturation. Here is an example:
The shape of the curve (see screen shot below) now maps highly saturated pixels to de-saturated ones. This means that saturated pixels are now in black and white.
By editing other sections of the curve, you can selectively saturate or de-saturate portions of the edited image.
Editing the saturation curve:
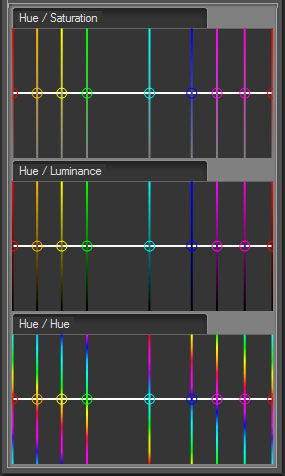
Color EqualizerThe Color Equalizer works just like an audio equalizer. Instead of modifying bass or treble, it acts on the various hues of the edited photo. The Color Equalizer can create a large range of effects. Here are a few examples:
The Color Equalizer is split into three parts:
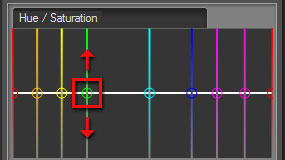
Hue/Saturation: Use the Hue/Saturation curve to increase or decrease the saturation of pixels with a given hue.
Hue/Luminance: Use the Hue/Luminance curve to increase or decrease the luminance of pixels with a given hue.
Hue/Hue: Use the Hue/Luminance curve to shift the pixels with a given hue to another hue, such as orange to red, blue to green, etc.
Editing the Hue/Saturation curve:
The Hue/Luminance and Hue/Hue curves work the same way.
To learn more about curve edition, read: User Interface Main Controls.
Comment: The Color Equalizer is also a powerful tool to convert a photo to black and white. The process is as follows:
With this approach you can, for instance, darken a blue sky in a black and white photo.
|
|
| Copyright © 2025 Oloneo SAS |