|
Last modified: 2011-06-02
HDR ReLight: Editing a ProjectTo learn how to create a HDR ReLight project read the previous chapter. After creating or loading a project, the image is displayed in the Edit Workspace with default settings.
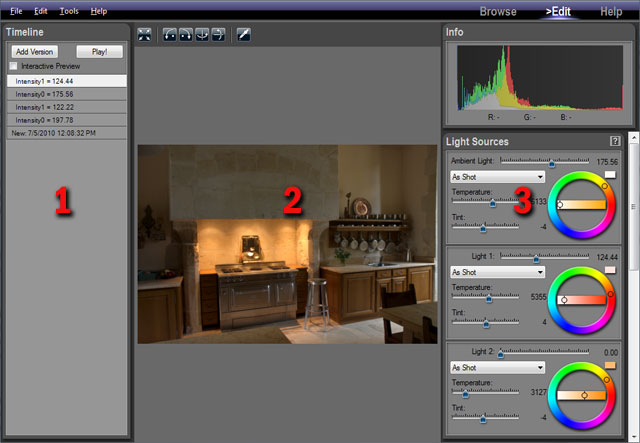
When editing an HDR ReLight project the Edit Workspace contains three main areas:1: the Timeline panel on the left of the screen 2: the edited image displayed in the center 3: the light sources and image settings on the right
To edit the image simply click and drag the various sliders located in the right panels. PhotoEngine automatically updates the image in real-time.
Editing light sourcesWhen creating the project, PhotoEngine automatically detects the color, temperature, intensity of the scene light sources, ambient light and shadows. These values are displayed in the Light Sources panel.
The Light Sources panel provides unique features such as:
The Light Sources panel is divided into two to six sub-panels, one for each light source. The number is equal to the number of photos used to create the project.
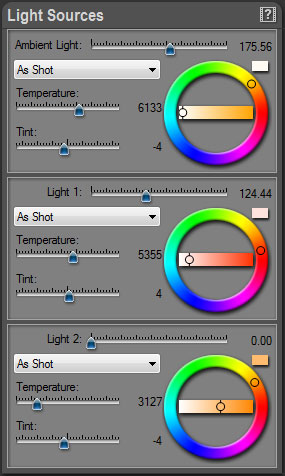
When PhotoEngine has detected that the scene has ambient light (for instance coming from a window), the sub-panels are listed as follows:
When no ambient light is detected, the list of sub-panels is:
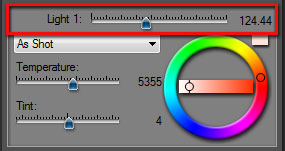
To edit an individual light source, select one of the sub-panels and modify the settings.
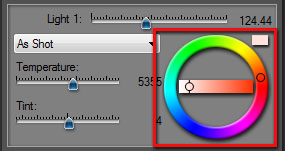
Editing light source intensity:
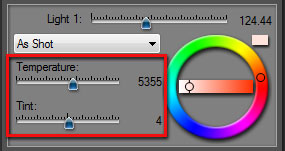
Editing light source temperature and tint:
Remark: The Temperature and Tint sliders allow you to directly define the light source color physical appearance. When you set the Temperature to 2800K, the edited source will light the scene like a real Tungsten light with a warm color would do. This is the reverse of White Balance edition where the goal is to neutralize the color cast of light sources.
This feature is very powerful. By changing the Temperature and Tint of individual light sources, you can:
Setting the light source color to a normalized illuminant:
Directly editing the light source color:
With this feature you can create creative light setups with highly saturated colors. This is often useful when photographing objects for catalogs, industrial applications, interior design, etc. Interesting effects can be obtained by using complementary colors such as blue/cyan and orange for light sources coming from opposite directions.
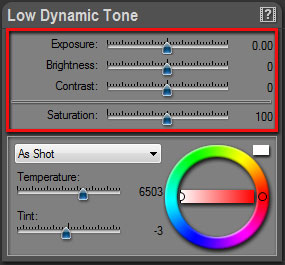
Editing Image settingsWhen you are done with light setup, you can start working on general image settings with the Low Dynamic Tone and Brightness Curve panels.
Editing key image settings:
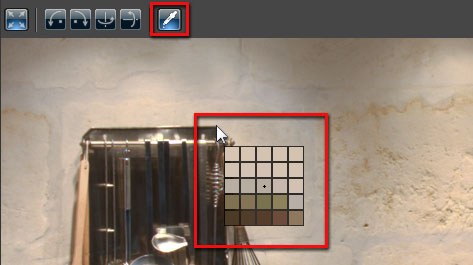
Editing the white balance:
Setting the white balance with the Eye Dropper:
Remark: White Balance settings affect all the light source colors. This should be your last step after editing the light source colors. Doing the reverse can make the light source edition confusing.
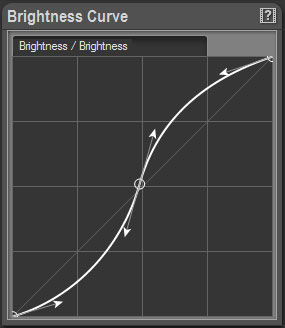
Using the brightness curve:
To learn more about curve edition, read: User Interface Main Controls.
|
|
| Copyright © 2025 Oloneo SAS |