|
Last modified: 2011-06-02
HDR ToneMap: Advanced Local Tone MapperOverviewThe Advanced Local Tone Mapper offers expert settings and allows a finer control of Tone Mapping. Use the Advanced Local Tone Mapper after mastering the Local Tone Mapper and when you need to fine tune a Tone Mapped image.
The Advanced Local Tone Mapper settings are displayed in the High Dynamic Tone Mapping panel when Advanced Local Tone Mapper is selected in the menu located at the top. The settings are grouped in four categories:
The Tone Mapping, Exposure and Contrast settings are equivalent to the settings found in the Local Tone Mapper. Read the Local Tone Mapper section to learn more about these settings.
The advanced settings allow you to:
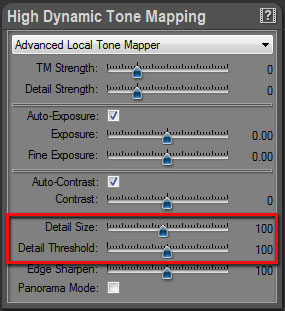
Detail settingsThe Detail settings are controlled by the Detail Size and Detail Threshold sliders.
Editing the Detail settings:
What is Detail Size? In the Tone Mapping process, PhotoEngine needs to classify the various elements of the image. There are two main categories: image details (such as: object texture, grass, tree leaves, etc.) and large objects (such as: sky, ground, building, etc.). The Detail Size defines what is classified in the image as details. When Detail Size is set to a small value, PhotoEngine classifies only the smallest objects in the scene as details.
What is Detail Threshold? In addition to object sizes, PhotoEngine also uses the local luminance variations to categorize the various elements of a photo. The Threshold slider controls that process. When set to a small value, PhotoEngine takes into account small luminance variations. For large values of Threshold, PhotoEngine ignores small luminance fluctuations.
When should I use Detail Size and Threshold? Detail Size and Threshold have no effect when TM Strength and Details Strength are both set to zero. To use Detail Size and Threshold you have first to set the TM Strength and Details Strength values.
For most images, TM Strength and Details Strength should remain unchanged. Change the values when the image shows excessive halos or to control image detail rendering.
How to edit Detail Size and Threshold? Detail Size and Threshold are truly advanced features and can be difficult to grasp. Sometimes the best method is to use an empirical approach:
As you gain more experience, you should be able to better understand how these settings affect an image.
A useful tip: Detail Size and Threshold effect can be quite subtle. In order to better see what you are doing, do the following:
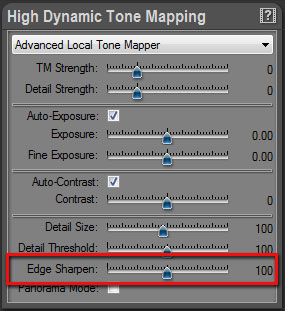
Edge SharpenEditing the Edge Sharpen setting:
What is Edge Sharpen? Edge Sharpen sets the local contrast around object edges. A low value reduces the edge contrast. Edge Sharpen also controls gradient reversal. Gradient reversal is an excessive Tone Mapping effect appearing around objects with extreme luminance variations such as a window frame taken from the inside of a dark room.
How to edit Edge Sharpen? As the Edge Sharpen acts at the pixel level, it is recommended to zoom in the image before editing.
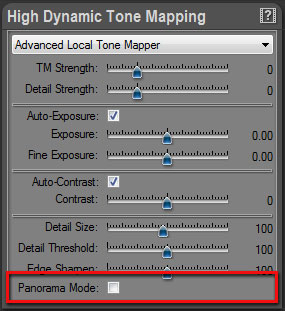
Panorama ModeWhen working on a 360 degrees equirectangular panorama, the left and right borders of the image are the same. Enabling the Panorama Mode forces PhotoEngine to keep the borders the same. This feature allows the Tone Mapping of seamless panoramas.
Editing the Panorama Mode setting:
|
|
| Copyright © 2025 Oloneo SAS |